OCIT Detection Patterns
OCIT-specific detection patterns and templates serve the same purpose as 'standard' detection patterns and templates, except they contain more fields dedicated to OCIT (Open Communication Interfaces for Road Traffic Control Systems) data.
Use OCIT Detection Patterns when working with OCIT-compliant signal-controller emulators, like Yutraffic Office, LISA and VS-Plus.
OCIT Detection Pattern Editor
To create a new detection pattern for your model:
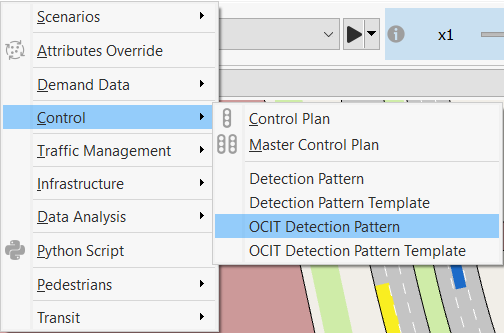
- Select Project > New > Control > OCIT Detection Pattern.
- Double-click the new OCIT Detection Pattern object to set it up.
An OCIT Detection Pattern can contain events of the following types:
- Detection Events, which can consist in setting the presence at a detector, or in sending of an R09 telegram at a calling point
- Simulation events, which can consist in requesting a change of signal program or a change of an OCIT flag of the running signal program
- SREM Events (supported only by Yutraffic Office controllers), which consist in sending an SRE message to the controller
Detection Events
To create a new detection event:
- Play the simulation until you reach the time when you want to create the event.
- Click on New.
- Select a detector from the dialog that appears.
Alternatively, click on the required detector in the 2D view. A new item is added to the OCIT Detection Pattern editor's Detection Events list.
-
To edit the event, select its row and input the required values for its parameters into the relevant cells.
-
If the event has no specified duration, advance the simulation to the desired stop time for the event and then click the same detector to set the duration.
Note: Multiple detection events can be opened on multiple detectors at the same time; clicking a second time on each detector closes that particular event.
- Tick Auto Pan if you want to pan to the detector affected by the detection event in the 2D view.
- To remove an event from the list, select the event and click Remove.
- Click OK to save your changes or proceed to Simulation Events.
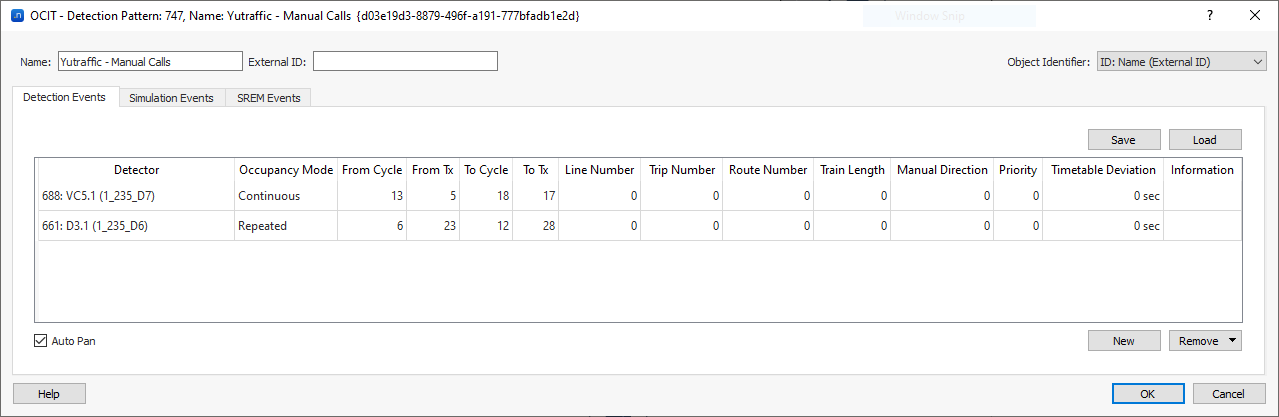
The dialog contains the following fields that are in common with standard detection patterns:
- Detector
- Information
The additional fields are:
- Occupancy Mode – used to set whether the presence on the selected detector lasts for the whole period between from Cycle from Tx and to Cycle to Tx (continuous), or turns on and off every second during that period (intermittent), or is continuous from Tx to Tx at each cycle between From Cycle and To Cycle (repeated). Note that a single actuation is a continuous actuation in which to Tx is just one secon greater than from Tx.
- From Cycle, From Tx, To Cycle, To Tx – used to set the start and end time of the presence. Note that, while a basic detection pattern period is defined by a start time and a duration, an OCIT detection pattern is defined by a cycle number and a time within the cycle for the start and end times.
- Line Number, Trip Number, Route Number, Train Length, Manual Direction, Priority, and Timetable Deviation – these are additional data included in an R09 telegram and, when filled, will trigger a telegram to a calling point, instead of just a presence to a detector.
If you would like more information about these extra fields, consult the document OCIT Outstations Traffic Signal Controllers. Some terminology can vary between Aimsun Next and OCIT, for example we use "Timetable" where the OCIT guide uses "Schedule".
Simulation Events
Simulation events allow you to:
- request a change to another signal program
- turn on/off central control
- turn on/off actuated control (only for LISA and vs|plus; for Yunex controllers the same effect is achieved by turning off both individual traffic actuations and transit prioritization)
- turn on/off individual traffic actuations
- turn on/off transit prioritization
- turn on/off any of the four partial intersections
The simulation events can be used for two different use cases:
-
Perform a set of tests to verify that the controller responds as expected to the requested changes. For this use case, you can schedule the simulation events in one of the following ways:
-
a. Launch a simulation and at any time while it runs, open the Controller object, go to the Simulation Control tab and modify the Requested Signal Program or activate/deactivate one of the OCIT flags (note that you can pause the simulation before making these modifications, so that you can apply more than one at the same time, or set more precisely the time at which they are applied by advancing the simulation clock step by step).
If an **OCIT Detection Pattern** is assigned to the Scenario, you can save these events in it by selecting the *Add to Current Scenario Pattern* option before making the changes. The next time you run the same simulation, the saved simulation events will be replayed, thus providing a convenient way to repeat the same tests after you make any changes. </br> -
b. Schedule prior to the start of the simulation all modifications by manually filling the Simulation Events tab of an OCIT Detection Pattern. To add simulation events to the detection pattern:
1. Select an event type from the **Field** drop-down list. 2. Input **Cycle** and **Tx** to set when the request of change will be sent to the controller. 3. Set in **Value** the requested change (e.g. number of signal program for a Control Plan Change, or on/off for the state of a Partial Intersection) 4. Select under **Intersection** a Controller from the drop-down list. 5. Repeat for more events if required. 6. Click **OK** to save. </br>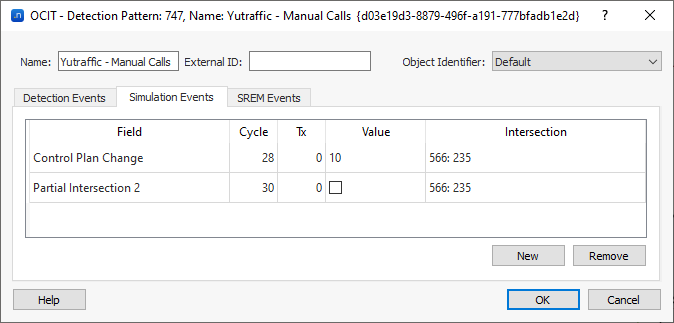 -
Simulate how the real controller operates in reality with scheduled changes of the signal plan and of the OCIT flags. For this use case, you can setup the changes during the simulation in one the following ways:
-
a. Configure in the Master Control Plan which Control Plan is active at different times of the day and the corresponding state of the OCIT flags. Note that if you just want to change the value of an OCIT flag at a certain time, you have to add again the same control plan and, while it is selected in the Gannt chart, set the OCIT checkboxes as needed.
When a simulation runs with this Master Control Plan, it automatically requests to the Controller the signal program to load and the OCIT flags to set according to what has been scheduled. This approach is therefore suitable for prescheduled changes. </br>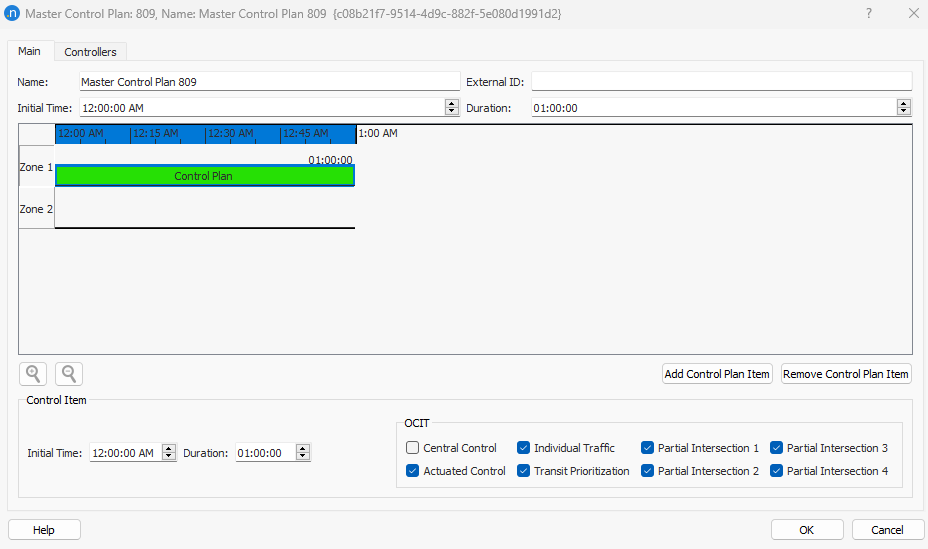 -
b. Apply a Control Plan Change traffic management action triggered by Time or via Trigger. This approach is therefore suitable for changes that are applied according to the traffic conditions.
</br>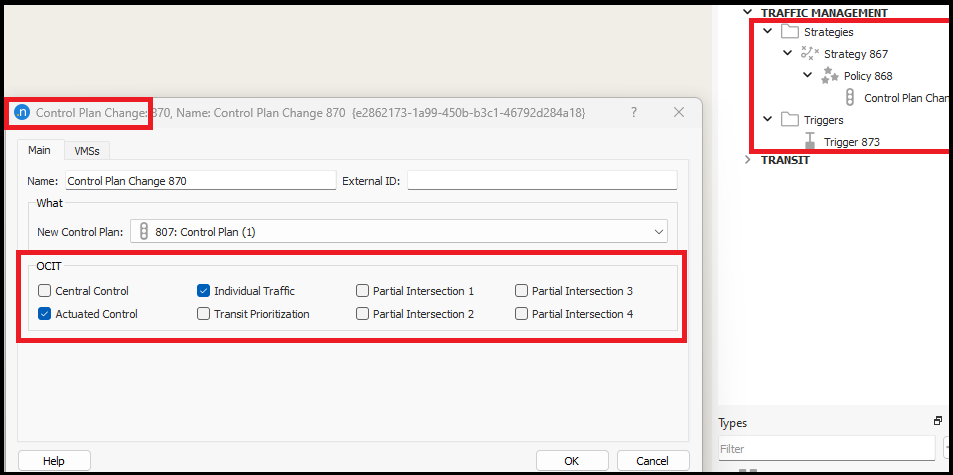
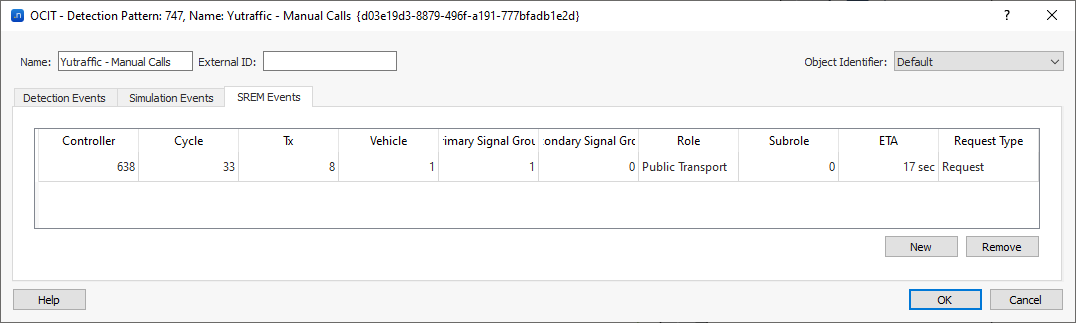
SREM Events
SREM Events allow you to send SRE Messages (SREM). SREM are standard V2I messages defined by OCIT to enable signal priority via wireless communication between the vehicles and the signal controller. This functionality is currently supported only by Yutraffic controllers.
The OCIT Detection Pattern allows you to programmatically send SRE messages to a controller for example when you are running a testing procedure for its program.
For each message you can define:
- ID of the vehicle
- ID of the signal group that gives right of way to the vehicle
- ID of a secondary signal group that gives right of way to the vehicle (if any, otherwise 0)
- Role of the vehicle
- Subrole of the vehicle
- Estimated time to arrive at the stopline (seconds)
- Request type (initial request, request update - typically to update the ETA -, or cancellation of the request)
Additionally, you must define the controller to send the message to and the time at which the message is sent, in terms of cycle number and Tx.
OCIT Detection Pattern Template Editor
To create a new detection pattern template for your model:
- Select Project > New > Control > OCIT Detection Pattern Template.
- Double-click the new OCIT Detection Pattern Template object to set it up.
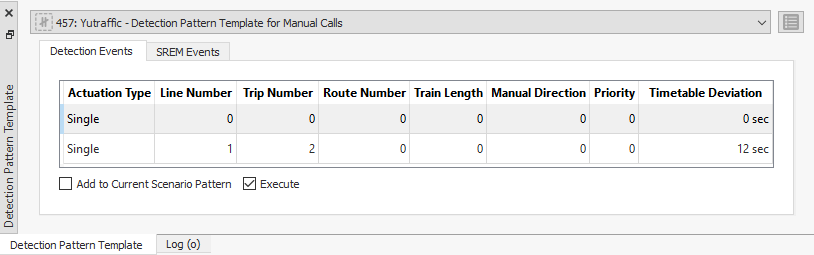
You can use an OCIT Detection Pattern Template when you want to send to an OCIT controller detection events (presence or R09 telegrams) or SRE message interactively during a simulation. As with the ‘standard’ Detection Pattern Template, for the event to be sent you have to ensure that 'Execute' is checked.
If you check 'Add to Current Scenario Pattern' and the scenario of the running simulation has an OCIT Detection Pattern asociated, the event is saved in that detection pattern. This allows you to record a testing procedure that you can later rerun without any manual interaction.
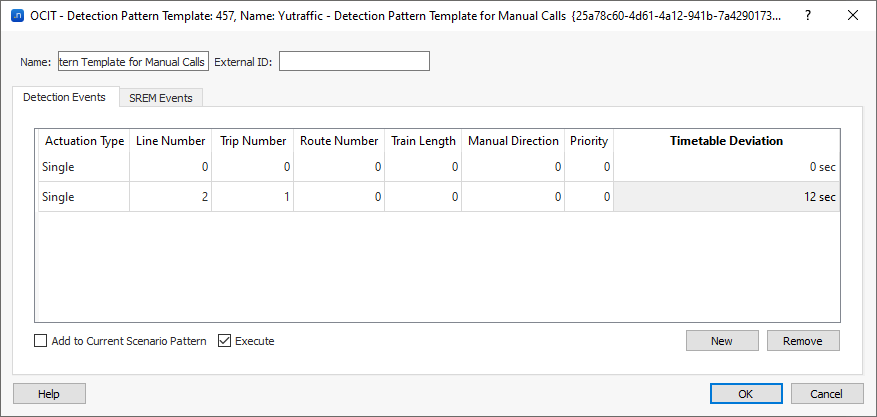
Detection Events
To trigger presence on a detector, just create a new item in the Detection Events tab (the values of the item are irrelevant), select it and then click on a detector while the simulation is running.
Note that a simple click triggers a presence for one second, Ctrl + click sets a continuous presence until you click again on the same detector, and Shift + click sets an intermittent presence until you click again on the same detector.
To send an R09 telegram, create a new item in the Detection Events tab and fill the fields that define its content:
- Line Number
- Trip Number
- Route Number
- Train Length
- Manual Direction
- Priority
- Timetable Deviation
Select it and and then click on a calling point to send a transit telegram.
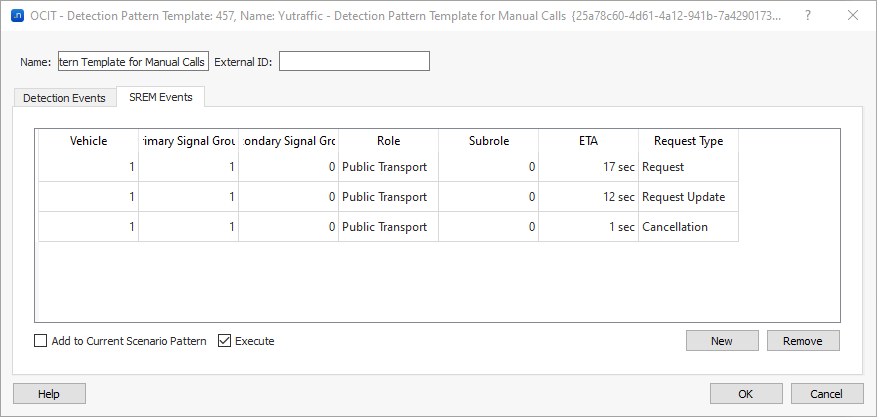
SRE Messages
To send an SRE message, create a new item in the SREM Events tab and fill the fields that define its content:
- ID of the vehicle
- ID of the signal group that gives right of way to the vehicle
- ID of a secondary signal group that gives right of way to the vehicle (if any, otherwise 0)
- Role of the vehicle
- Subrole of the vehicle
- Estimated time to arrive at the stopline (seconds)
- Request type (initial request, request update or cancellation of the request)
Select it and and then Shift + click on a Controller to send a SREM.
Detection Pattern Template Window
To use an OCIT Detection Pattern Template you must keep its dialog open, and this may occlude part of the view. To avoid this inconvenience, you can open a Detection Pattern Template Window by selecting Window > Windows > Detection Pattern Template.
As the other windows, the Detection Pattern Template Window can be docked to a side of the Aimsun Next application, thus not occluding the model views.
Once you have created an OCIT Detection Pattern Template, you can select it in the drop-down menu at the top of the window, and you can activate an item of the template by selecting it in the window.
You can apply changes to the values in the window, but these changes are temporary, they are not stored in the corresponding template. If you want to make changes to the template, press the edit button on the upper right corner.