Legion for Aimsun Pedestrian Simulator
As mentioned in Aimsun Next pedestrian simulator, for microsimulations there is a choice of two pedestrian simulators: the Aimsun Next pedestrian simulator and the Legion for Aimsun pedestrian simulator, described in this topic. The two simulators are complementary but best serve different types of project.
Legion for Aimsun is particularly useful for pedestrian engineers working with OpenBuildings Station Designer and the Legion Simulator. It is designed to model the interaction between pedestrians and traffic around pedestrian facilities, ranging from stations to sports venues, and the activities of pedestrians inside those facilities, including the use of escalators, elevators, turnstiles, and vending machines, etc.
Note: One key difference between the two simulators is that, currently, focal points, and focal segments (mentioned in Aimsun Next pedestrian simulator, to which this current topic links several times) only apply to Legion for Aimsun.
Legion for Aimsun is a plug-in for Aimsun Next microscopic simulation that needs to be installed separately. Refer to the Legion for Aimsun Installation section before proceeding. This engine requires a license that is provided by Bentley. Refer to the Legion License section for details about obtaining and installing the required Legion License. Note that Legion is only available for the Windows version of Aimsun Next.
The following subsections describe how to model pedestrian-traffic interaction in Legion for Aimsun. Many of them link to the Aimsun Next Pedestrian Simulator topic.
- Pedestrian Types: How to create pedestrian types.
- Pedestrian Navigation Areas: Configuring the areas where pedestrians move.
- Pedestrian Crossings and Crosswalk Areas: Configuring the areas where pedestrians and vehicles interact.
- Signalized Pedestrian Crossings and Crosswalk Areas: Including a pedestrian crossing or a crosswalk area in a signal control plan.
- Pedestrian Centroids: Configuring pedestrian destinations.
- Routes and Demand: Setting the pedestrian demand and the routes taken.
- Transit: Describing how pedestrians board and alight from transit vehicles.
- Simulation: Running the simulation.
- Outputs: Documents the outputs provided by the pedestrian simulator.
- Legion for Aimsun Installation: Info to install before trying to run Legion with Aimsun Next.
- Legion License: How to obtain a License to run Legion with Aimsun Next.
Note: Your version of Aimsun Next might use ‘Transit’ rather than ‘Transit’, depending on localization preferences.
Pedestrian Types
Pedestrian types are described in the Aimsun Next pedestrian simulator topic.
Pedestrian Navigation Areas
Pedestrian navigation areas are described in the Aimsun Next pedestrian simulator topic.
Define Where Pedestrians Cannot Go
The creation of obstacles is described in the Aimsun Next pedestrian simulator topic but the definition of what automatically becomes an obstacle in Legion for Aimsun is different from the Aimsun embedded pedestrian simulator and it is explained next.
Generate Obstacles Automatically
The Legion for Aimsun plug-in provides several ways to generate obstacles automatically to save time when building a pedestrian area.
Layer
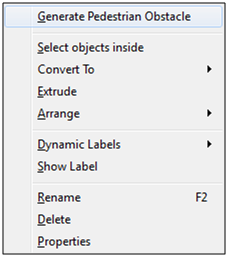
Right-click over any layer to open the context menu and select the Generate Pedestrian Obstacles option
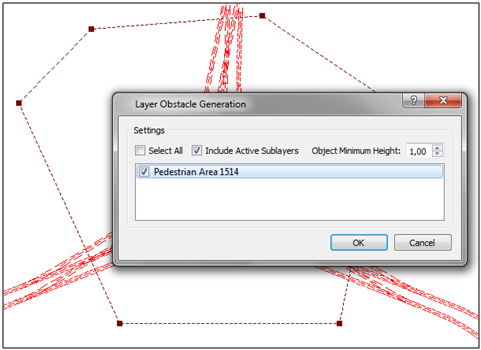
The Layer Obstacle Editor window will open to create the settings for generating obstacles.
Check the "Select all" box to apply this to all available pedestrian areas.
The "Include Active Sublayers" option will process all active sublayers as well.
Finally, the "Object Minimum Height" box will generate obstacles for extruded polygons based on their height.
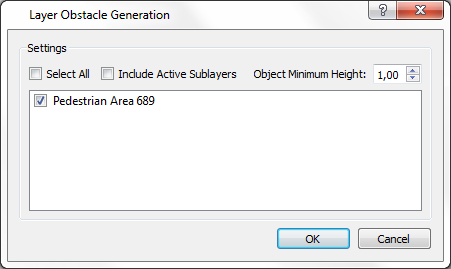
This will generate obstacles automatically in all pedestrian areas that have been checked and for all extruded polygons that fit the defined minimum height.
The following images show the process for automatically generating obstacles within pedestrian areas:
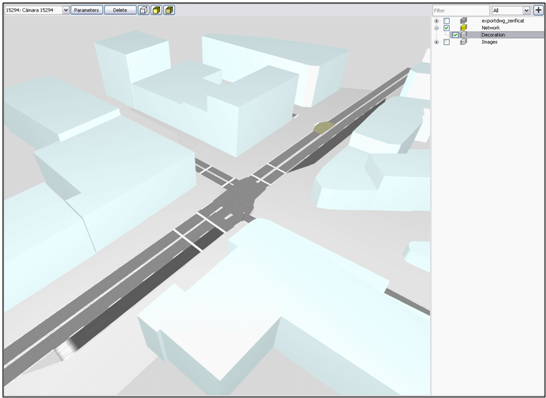
The next figure shows a 3D view of a network containing buildings. The aim is to create obstacles for all buildings near the main intersection (i.e. to specify that pedestrians cannot enter these areas).
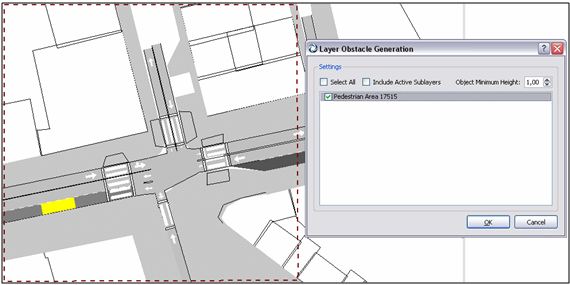
The next figure shows the Layer Obstacle Editor settings for the "Decoration" Layer.
The next figure shows the final results. Polygon obstacles have been created for all buildings near the main intersection.
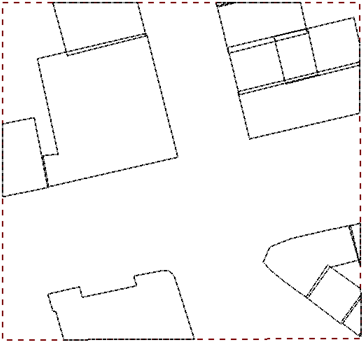
AutoCAD Layer
Layers coming from AutoCAD as a .dwg /.dxf file are treated in a different way to "normal" layers. These contain objects with 2D co-ordinates so the minimum height value is ignored.
The images below show the process for automatically creating obstacles from AutoCAD objects:
The next figure shows the AutoCAD active layer contents. Note that the generation process will be applied only to active layers.
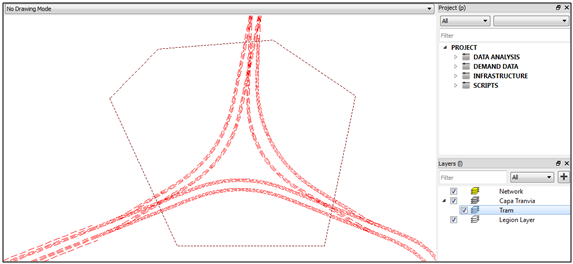
The next figure shows the Layer Obstacle Editor settings for the CAD layer.
The next figure shows the combined results of the "Decoration" layer (in blue) and the AutoCAD layer (in red).
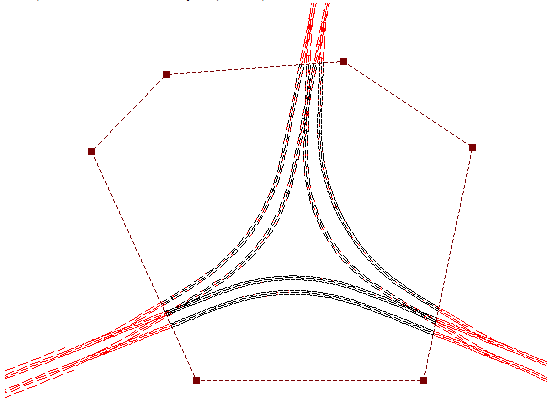
Pedestrian Area
Obstacles can also be generated directly from a selected pedestrian area. This will create obstacles from visible objects of the following types:
- nodes
- sections
- polylines
- polygons
Any turnings or Legion objects will be ignored.
Right-click over a pedestrian area and select the Generate Pedestrian Obstacles option to generate the obstacles.This will create a new set of pedestrian obstacles.
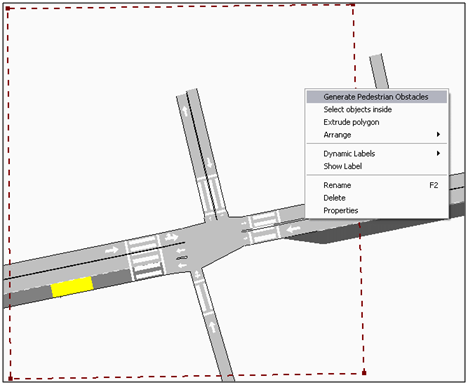
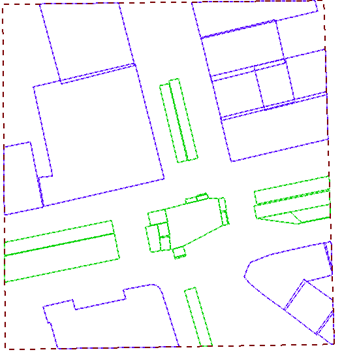
Network Object
Finally, a single object obstacle can also be generated within a pedestrian area. Select the object and right-click on it, then select the Generate Pedestrian Obstacle option.
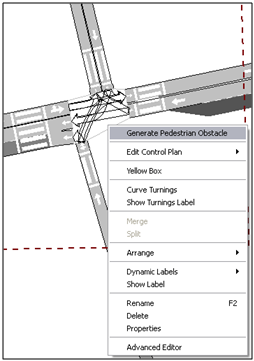
A new obstacle will be created automatically for the object.
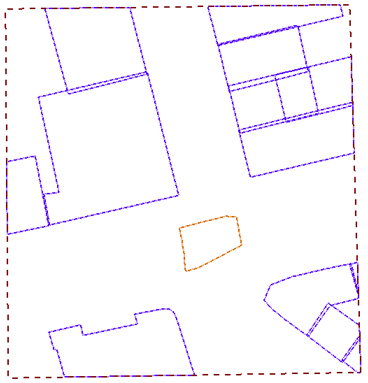
Important Notes for Creating Pedestrian Obstacles
-
Pedestrian obstacles can only be placed inside a pedestrian area.
-
If the shape of a pedestrian area is changed, any obstacle geometry loaded into Legion will be adjusted to fit this area.
-
Either polyline or polygon obstacles can be created using automatic obstacle generation options.
When obstacles are generated automatically this will override settings for all obstacles linked to the object or area. For example: if obstacles are generated for an entire pedestrian area it will affect all objects within the area. If obstacles are generated for a network object it will only affect obstacles associated with the object and not those in the wider pedestrian area. Settings can be changed for individual obstacles after automatic generation if required.
Pedestrian Crossings
Pedestrian crossings are described in the Aimsun Next pedestrian simulator topic.
Crosswalk Areas
Crosswalk areas are described in the Aimsun Next pedestrian simulator topic.
Signalized Pedestrian Crossings and Signalized Crosswalk Areas
Signalized pedestrian crossings and signalized crosswalk areas are described in the Aimsun Next pedestrian simulator topic.
Pedestrian Centroids
Pedestrian entrance and exit centroids and pedestrian centroid configurations are described in the Aimsun Next pedestrian simulator topic.
Routes and Demand
Pedestrian OD Routes
Routes are described in the Aimsun Next pedestrian simulator topic.
Route Elements
A pedestrian OD route is likely to have intermediate targets, or sections in an OD route, between entrance and exit. For example, these might include pedestrian crossings, decision nodes, service points, or level changes.
These must be set in the correct order, and the list of pedestrian crossings and level changes must be complete so that the route is fully determined for pedestrians to use.
Pedestrian crossings, decision Nodes and level changes are described in the Aimsun Next pedestrian simulator topic.
Service Points
Service points are areas where pedestrians can wait for a while and then continue on their path. You can use them to model information boards, ATMs, and shops, etc. To create a service point, click the Create a Service Point tool in the Tools toolbar, click in the 2D view and drag its vertices to define the shape of the service point.

Service points have two different areas: an outer area and an inner area. The outer area is unshaded and defines the zone in which pedestrians will be redirected to the inner shaded area where they will receive the service. You can change the relative size of these areas by dragging the middle vertex of the service point. You can also move or rotate the service point area as required.
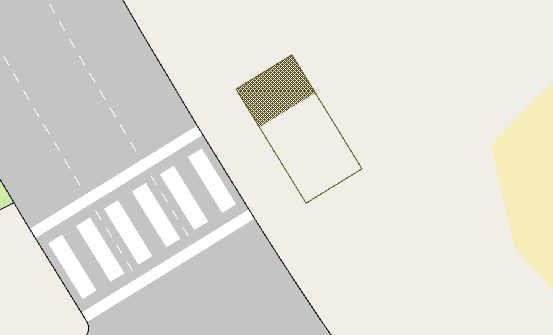
Double-click the service point to open the Pedestrian Service Point dialog.
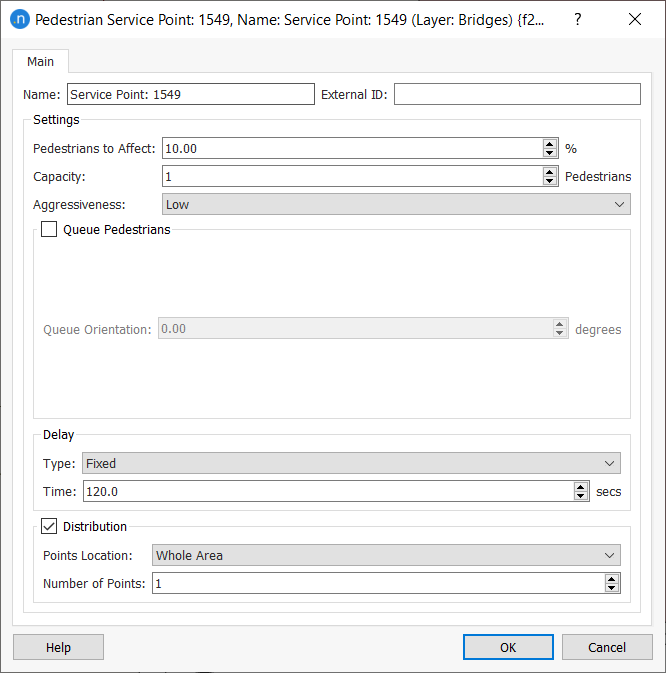
The following parameters can be set.
- Pedestrians to Affect: Percentage of pedestrians crossing over the outer area of the service point that will be kept waiting.
- Capacity: Number of pedestrians that can be serviced at the same time.
- Aggressiveness: Defines the behavior of pedestrians when moving toward their waiting position:
- Low: Pedestrians will stop as soon as they can. They will not try to reach their waiting position unless there is no one else between them and their destination
- Medium: Pedestrians will try to reach their waiting position if there aren’t too many other pedestrians between them and their destination
- High: Pedestrians will try to reach their waiting position even if the service point is fully occupied.
- Queue Pedestrians: Tick this option to create a queue before entering the inner waiting area of the service point.
- Queue Orientation: Tick this option to define the angle of the queue in relation to the service point (e.g. 45° or 90°).
- Delay Time: Select one of three different kinds of delay:
- Fixed: Pedestrians will wait for a fixed time
- Wait Until: Pedestrians will wait until a certain time
- Variable: Pedestrians will wait for a variable time, defined with a Mean Time and Deviation (both in seconds).
- Distribution: Tick this option to define how pedestrians are distributed at the service point. You can choose one of four options for placing the distribution points that pedestrians will aim for:
- Top
- Middle
- Bottom
- Whole Area – Whole Area will distribute points across the whole of the shaded zone.
- Number of points: The number of distribution points that will be generated. This depends on the size and nature of the service point.
Creating a Pedestrian OD Route
The process to create a new pedestrian OD route between entrance and exit centroids is described in the Aimsun Next pedestrian simulator topic.
Define Pedestrian Trips with a Pedestrian OD Matrix
Pedestrian trips between the origin and destination are defined using a pedestrian OD matrix, which is described in the Aimsun Next pedestrian simulator topic.
Transit
The transit interface is used to simulate pedestrians boarding or alighting from transit vehicles.
Transit Stops
Parameters
Transit Stop parameters for pedestrians are described in the Aimsun Next pedestrian simulator topic.
Entrance and Exits
Transit Stops, Entrance, Exits, and Waiting Areas are described in the Aimsun Next pedestrian simulator topic.
Timetable Editing
Vehicle attributes are described in the Aimsun Next pedestrian simulator topic.
Vehicle Attributes
Vehicle attributes are described in the Aimsun Next pedestrian simulator topic.
OD Matrix editing
Exit centroids linked to any transit stop will appear in the Trips table to define the amount of people moving toward the stop.
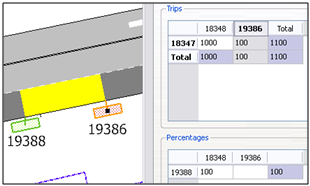
Entrance centroids linked to any transit stop will appear in the Percentages table to define the pedestrian destination percentage. This percentage must sum to 100. The number of pedestrians that will alight from a bus is defined in the transit line timetable
OD Route editing
As for normal entrance centroids, routes starting in a transit stop can be defined by selecting the linked entrance centroid as the OD route origin centroid.
Simulation
Setting up a simulation with pedestrians is described in the Aimsun Next pedestrian simulator topic.
Pedestrian Simulator Outputs
Pedestrian Simulator Outputs are generated by checking the Sections, Traffic Demand (OD Pairs), Pedestrian Crossings, Transit Stops, and Service Points options in the Dynamic Scenario editor, Output/Statistics tab. Outputs that are common to Aimsun Next embedded pedestrian simulator are described in the Aimsun Next pedestrian simulator topic.
Service Point Outputs
For each pedestrian type, and the aggregated value for all pedestrian types (grouped under Pedestrian: All), the following time series will be linked to the simulated service points:
- Attracted People: Number of pedestrians that detoured to visit the service point.
- Crossing People: Number of pedestrians that have crossed the service point area.
- Served People: Number of pedestrians served at the service point.
- Waiting Time: Mean pedestrian waiting time at the service point.
Pedestrian Trajectories
For each pedestrian in the simulation that fits the constraints defined in Individual Vehicles dialog, Aimsun Next provides global and detailed trajectory information. These trajectories are stored in the outputs database in the LEGIONPEDESTRIANTRAJECTORY and LEGIONPEDESTRIANDETAILEDTRAJECTORY tables. Consult the Microsimulation Pedestrian Outputs Section for the table format.
Legion for Aimsun installation
The Legion for Aimsun plug-in as well as the Bentley Connection Client installer needs to be installed separately from the Aimsun Next. Please install the Legion for Aimsun installer that goes with the Aimsun Net installer you will be using before proceeding to simulate with pedestrians.
Legion License
A Legion license is required to use the embedded Legion pedestrian simulator in Aimsun Next. This license is handled directly by Bentley, the owner and developer of Legion software. For further assistance, please contact a regional account manager at Bentley using the form below.
Contact Bentley's regional account manager by filling the form at: https://www.bentley.com/en/about-us/contact-us/sales-contact-request to get you registered obtain a 30-day trial license.