GTFS Importer
The General Transit Feed Specification (GTFS), also known as GTFS static, defines a common format for transit schedules and associated geographic information.
A GTFS feed consists of a series of text files collected in a single ZIP file. Each file holds a particular aspect of transit information: stops, routes, trips, and other schedule data. The details of each file are defined in the Transit Wiki GTFS reference.
GTFS Files
The GTFS Importer has a set of required and optional files:
Required:
- agency.txt
- stops.txt
- routes.txt
- trips.txt
- stop_times.txt
Optional:
- calendar.txt
- calendar_dates.txt
- fare_attributes.txt
- fare_rules.txt
- shapes.txt
- frequencies.txt
- transfers.txt
- feed_info.txt
Importing GTFS Data
To use the GTFS Importer:
- Create or import a network located at the same coordinates as the GTFS data.
- Create a file folder with the GTFS files *.txt. This folder must contain at least the set of the required files for the import to work.
GTFS Importer dialog
Open the importer dialog from the File -> Import menu
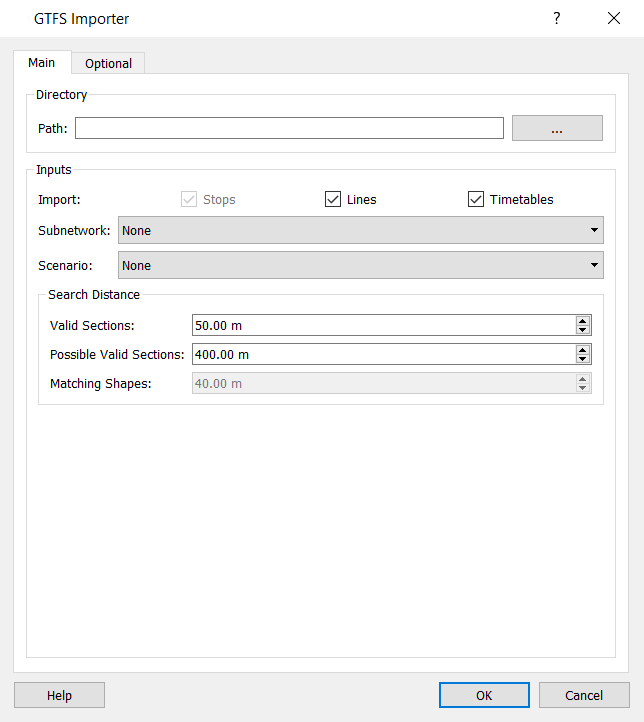
The steps to import the data are:
- Select the path to the folder with the GTFS data.
- Check/Uncheck stops, lines, and timetables to select what will be imported. This allows incremental working, for example, to first import stops, then fix possible misplacements, and subsequently import the lines with the stops correctly placed.
- Select a subnetwork to work with. The GTFS importer will create the transit lines within the boundaries of the subnetwork selected. The default is that the importer will use the whole network. The shapes will however be imported for the entire network and placed in GTFS_Shapes layer.
- Select a scenario to work with. The GTFS importer will create the stops and transit lines taking into account the geometry configuration of the scenario.
- Set the search distance:
- Valid Sections: The maximum distance from every stop/shape point to the sections which can be part of the line.
- Possible Valid Sections: This is the maximum distance to a section used to calculate if it is valid. Higher values imply higher search times but also better results.
- Matching Shapes: Relates polyline points in the shapes file with start/end points of sections. Higher distance implies more sections are searched but could result in remote sections being included. Note that a shapes file will show the path of the line in a stylized manner and hence not precisely coincide with the road sections. This option is only used when shapes are checked.
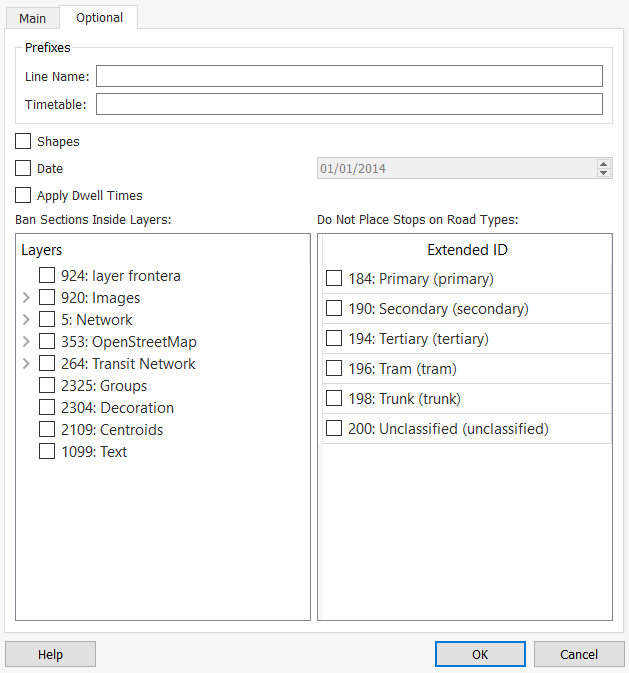
Optional:
- Set a prefix for line names and timetables.
- It is possible to update or add new timetables to previously imported transit lines. The prefix is used control whether the newly imported data replaces existing data or adds to it by differentiating the lines and timetable names. See the Notes section below.
- Check "Shapes" to create lines following the existing shapes, in shapes.txt, instead of following the shortest paths between Transit Stops. Warning: Importing with shapes does not always assure better results due to the need for high precision matching between the shapes data and the network.
- Check "Date" to create lines with an unique timetable for a specific day.
- Check "Apply Dwell Times" to set the offsets defined in the stop times to be considered by the simulation model.
- Check "Road Types" from the list so they are banned from having stops placed on them.
- Check the "Layers" which will be banned from having a stop or a public line placed on the sections in that layer.
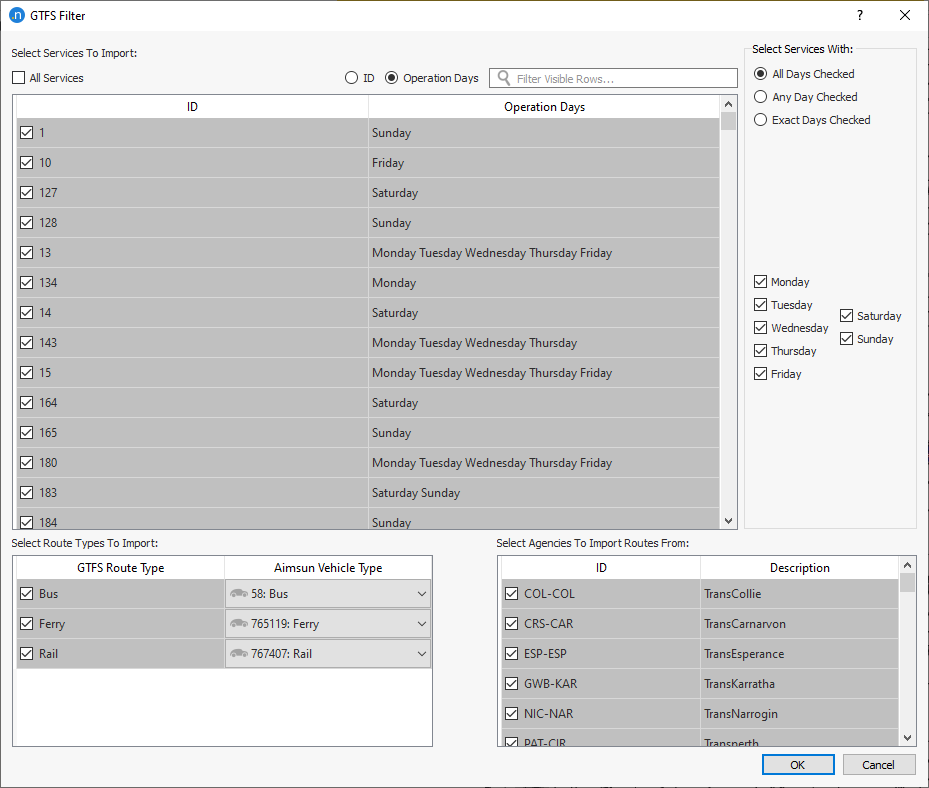
GTFS Filter dialog
Once GTFS files are read, the dialog below is opened.

This dialog allows the filtering of the transit lines and the timetables by route type, agency and services:
1. Service filter
a. Service table
It contains all the services included in 'calendar.txt'. It shows their ID and Operation Days. By default, 'All Services' option is checked. Unchecking it enables the user to check days of the week with a specific logic option ('All', 'Any', 'Exact'), or just directly check services in the table.
Warning When services are directly checked (selecting a specific service in the table), they must be checked after selecting days and logic desired because it overrides direct checks.
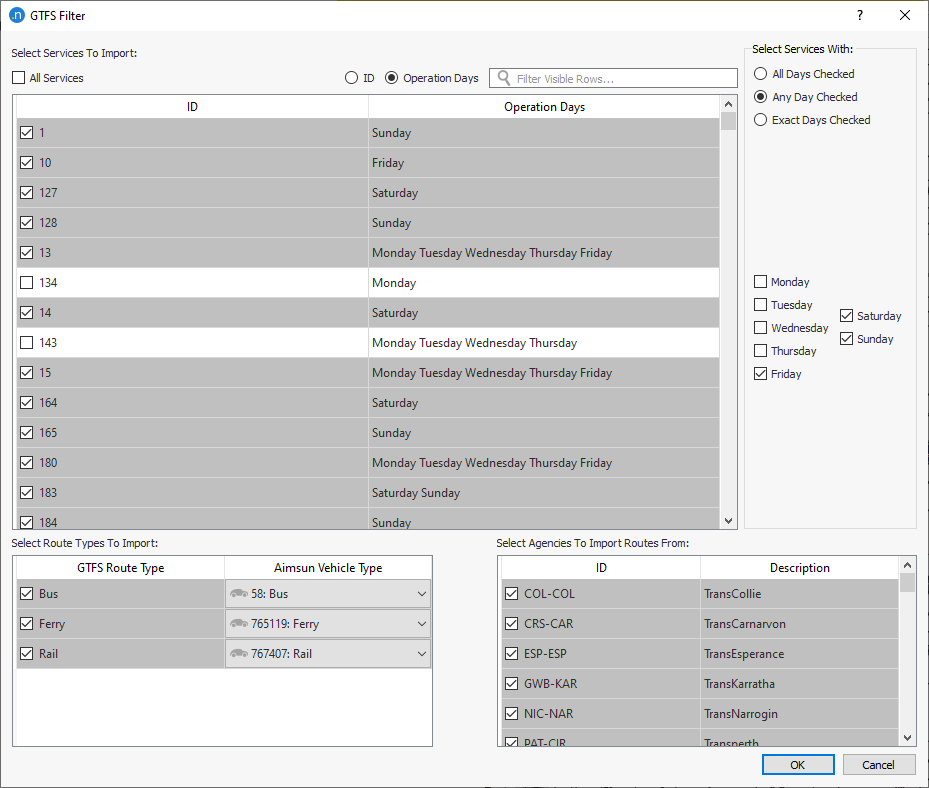
b. Days and logic
These options work together to check multiple services at once instead of having to do it directly.
- When 'All Days Checked' is selected: Services which have all of their operation days checked, will be checked.
- When 'Any Day Checked' is selected: Services which have any of their operation days checked, will be checked.
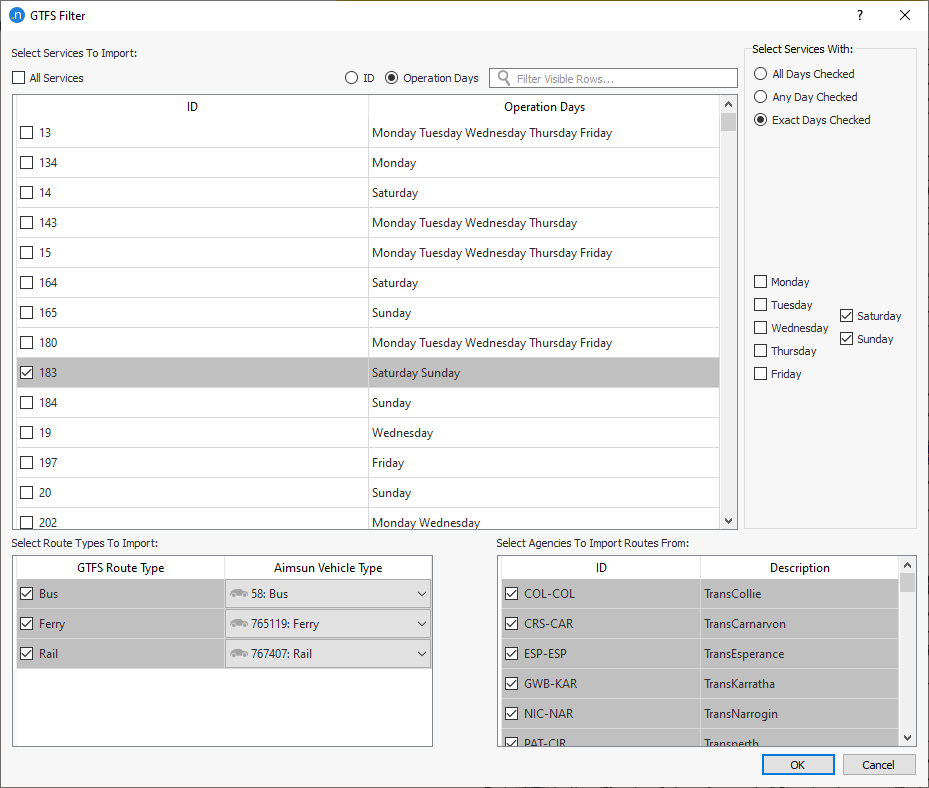
- When 'Exact Days Checked' is selected: Services which have only the days checked as their operation days, will be checked.
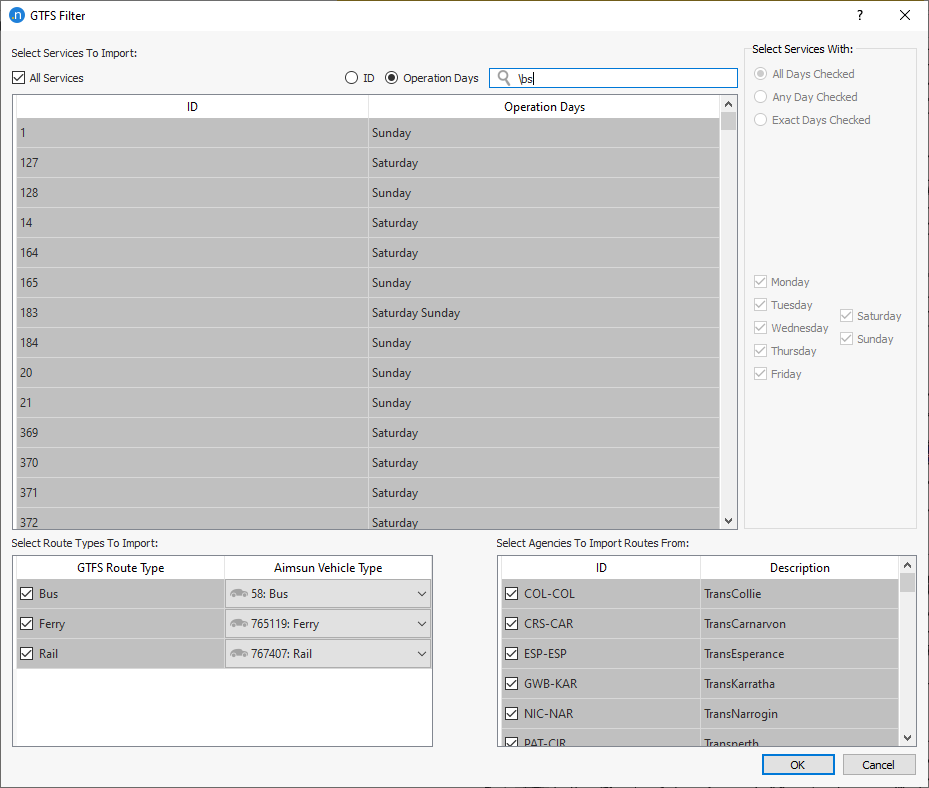
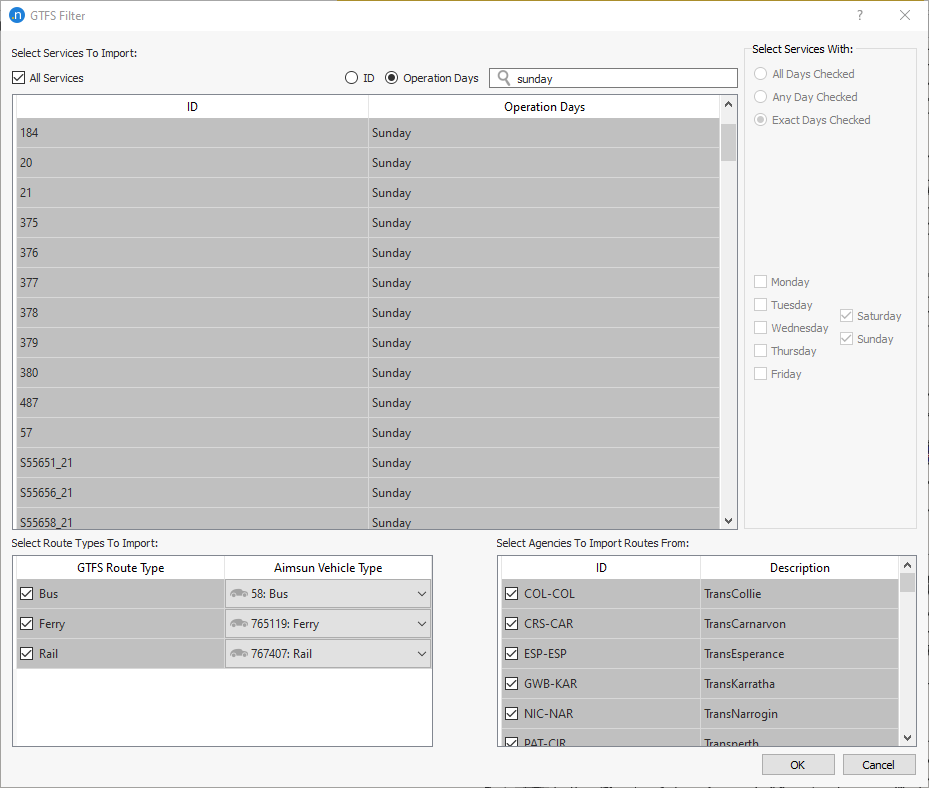
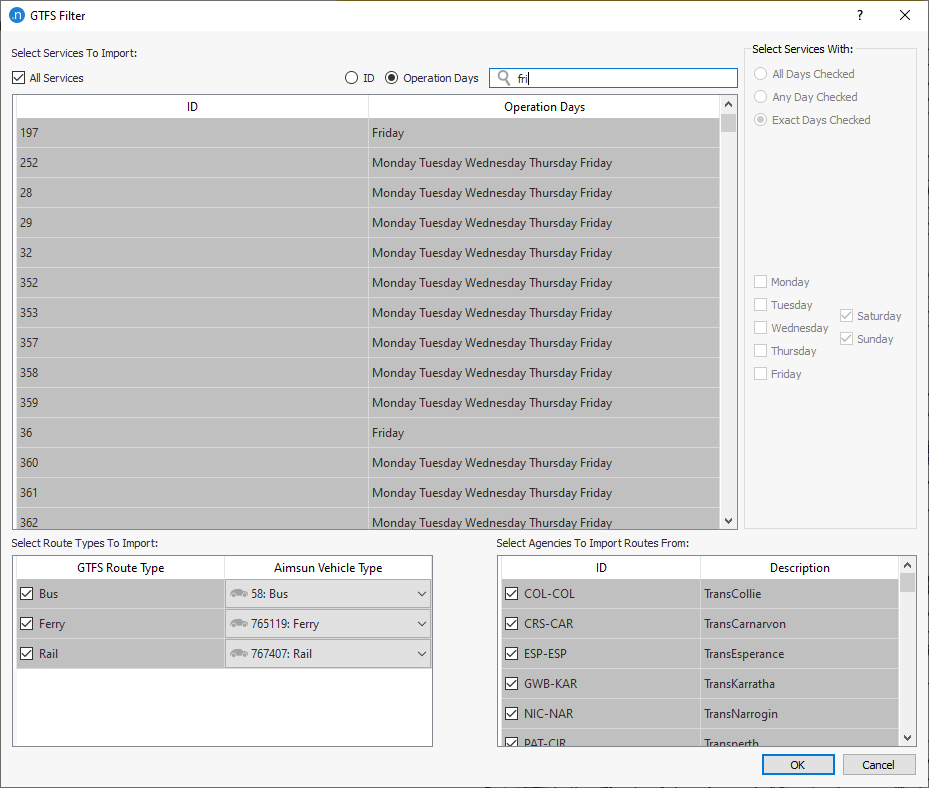
c. Search bar
Using the search bar visible rows can be filtered. It filters by column selected using 'ID' or 'Operation Days' option. Regular expressions can be used.
Examples of usage in Notes section.
2. Route Types filter
Contains each route type vehicle found in 'routes.txt'. If 'routes.txt' contains routes without an specified route type, they will have the "Bus" route type as default.
Here is where correlation between GTFS route types and Aimsun vehicles has to be defined by selecting the Aimsun vehicle to use in each case. By default, the dialog tries to open with the correct vehicle selected.
3. Agencies filter
Contains each agency found in 'agency.txt'. If 'routes.txt' contains routes without an specified agency id, they will be contained in a default agency with ID "No Agency".
Routes imported are the ones with checked GTFS route types and pertaining to selected Agencies. These routes will use checked Services to create Transit Line timetables.
GTFS Importer results
The GTFS Importer will create:
- The transit lines, with their stops and timetables in the network (depending on the options checked it might create only stops, lines, timetables)
- For each transit line, the following attributes are created:
- TripID: trip_id from 'trips.txt' file.
- RouteID: route_id from 'trips.txt' file.
- DirectionID: direction_id from 'trips.txt' file.
- StartDate: start_date from 'calendar.txt' file.
- StartTime: start_time from 'frequencies.txt' file.
- RouteColor: route_color from 'routes.txt' file.
- GTFSID: unique id of the route.
- GTFSStops: list of stops used by the transit line.
- Timetables:
- If specific date was selected, a timetable will be created if the line has service in that date, according to 'calendar.txt' and 'calendar_dates.txt'.
- By default, timetable's name will have a range of dates and weekdays of availability, as defined in 'calendar.txt'.
- Departure Time will be fixed unless there is frequency information related to the line in 'frequencies.txt'.
- A GTFS_Stops layer which contains the stop points, defined in 'stops.txt'.
- A GTFS_Shapes layer which contains the route shapes, defined in 'shapes.txt', as polylines.
- A GTFS_Routes layer which contains the polylines with the approximate itinerary and the stop points of every public line created. If a 'shapes.txt' file exists, these polylines will be created from the 'shapes.txt' file and can be used to compare with the route of the lines created. It is not necessary to check "Shapes" to include this.
Notes
- Prefixes are identifiers of lines and timetables used as a pair (line, timetable) placed at the beginning of the name and GTFSID. Re-importing a line with the same line name prefix(same GTFSID) will not change the route but using the same timetable prefix will overwrite the timetable.
- When stops are set manually, with the correct external ID (stop id in GTFS Data), and imported with "Shapes" checked, then stops which are not already on the line will be recreated on a road section forming part of the line.
- Stops set manually will be used to create the lines only if the external ID is the one the GTFS Importer creates. To correct the placement of a stop, just copy the external ID of the created stop, erase the external id and create another stop with this external ID before importing the lines. This method can be used to split or merge stops by addition or removal of the correct external ID.
- If the GTFS data is re-imported, and stops are present, ensure the external ID of the stops matches that of the data but delete the line to be re-imported or use a different line prefix.
- The public lines GTFSID is formed by the prefix, the id of the route, "_", and the id of every stop in the route in the following format: "id1:id2:...:idN". In the case of shapes, instead of the id of every stop, the id of the shape within the trip in the route is used.
- Increasing the "Matching Distance" implies that sections with polyline points far from their start/end might be included.
- The "Possible Valid Sections" distance is critical in determining the times taken to import GTFS data when using large and dense networks.
- Two stops were to be placed in the same section possibly caused by a too large section, bad matching or both. In this case, in the log, there is a warning which gives information about whether:
- A section has been created to contain one of the stops to avoid having two stops in the same section
- If the section was impossible to cut due to the proximity of the stops.
- The warning also contains the name of the GTFS transit line using those stops.
- When using "Shapes", aligning the line's polyline points with the start and end of sections will improve matching precision. The import can be redone if required by deleting the line, re-aligning the shape polyline in its layer and re-importing with the same line prefix.
- Days and logic examples:
-
All
-
Any
-
Exact

-
Search bar examples:
-
Full name:
-
Partial name:
-
Regular expresion: ('\bs', find 's' after a word boundary like a space or the start of a line).