Pedestrian Crossings
With Aimsun Next you can model pedestrian crossings, of an arbitrary length, at either the start or the end of a road section. Pedestrian crossings are, in a microsimulation, an extension of a node. Turns are placed on top of them to provide for the movement of pedestrians crossing the road. These pedestrian movements, like any other movement in a node, can be controlled by traffic lights as part of a signal group.
When simulating a non-signalized pedestrian crossing, the Aimsun Next microscopic simulator will give priority to pedestrians over vehicles: a yield restriction or stop line in the section is not required. If a yield restriction or stop line is placed at the end of the section, it will be used in the node to control any conflict movements, as usual.
Adding a Pedestrian Crossing
You can add a pedestrian crossing by using the Create a Pedestrian Crossing tool  .
.
To add a pedestrian crossing:
-
Click
and then click on the start or the end of the section where you want to place the crossing. -
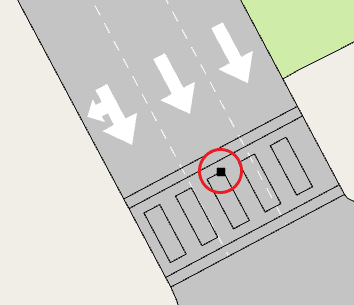
If you want to change its length, click to select the crossing and drag its internal vertex to adjust the length.
-
If you want to move the pedestrian crossing to a different section entirely, then hold down Ctrl, select the crossing, and drag it to the destination section.
Editing a Pedestrian Crossing
Like most Aimsun Next objects, you can edit a pedestrian crossing to fine-tune its parameters.
To edit a pedestrian crossing:
-
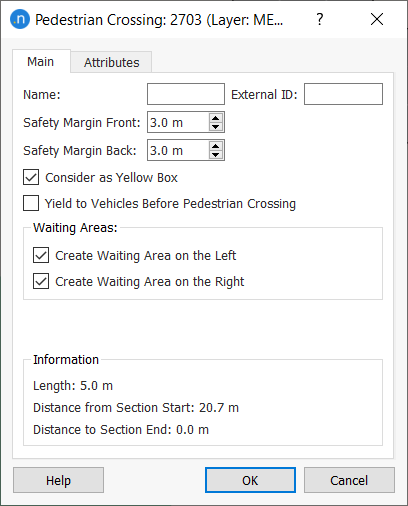
Double-click the pedestrian crossing to open its dialog.
-
Enter a new Name.
-
Enter values for Safety Margin Front and Safety Margin Back. These margins are the distance that vehicles will maintain between themselves and the pedestrians generated by Aimsun Next's embedded Pedestrian Simulator.
-
If you want to model the crossing as a yellow-box area where no vehicles can stop inside, tick Consider as Yellow Box.
-
For turns regulated by Yield, Stop, or RTOR rules, the option to Yield to Vehicles Before Pedestrian Crossing is available in the dialog.
In such cases, the stop line is always placed before the pedestrian crossing and this option controls where vehicles halt, according to different driving practices in some countries.
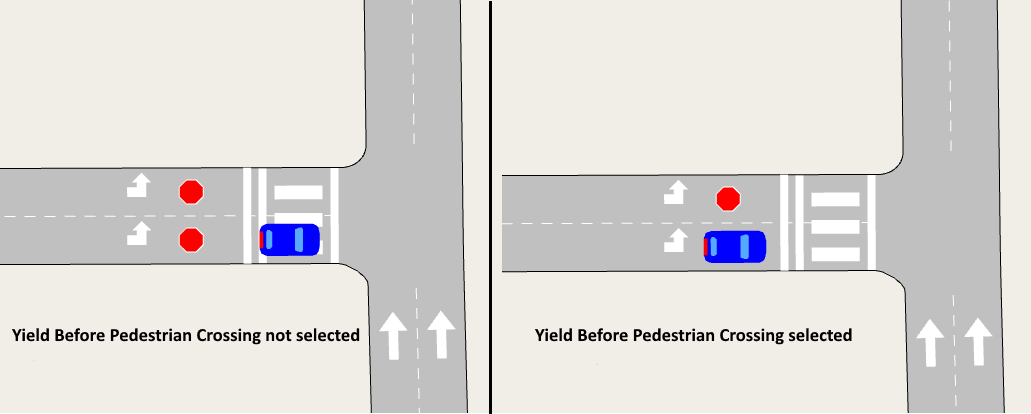
Tick Yield to Vehicles Before Pedestrian Crossing if you want vehicles to halt at the stop line. Untick this option if you want vehicles to halt at the end of the section, meaning they enter and wait on the crossing (see the two screenshots below).
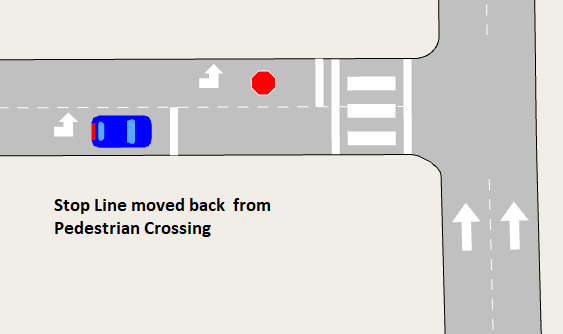
Note: If the stop line is set some distance away from the crossing and Yield to Vehicles Before Pedestrian Crossing is ticked, vehicles will stop at the stop line and not at the crossing.
-
Waiting areas are (optional) spaces next to a pedestrian crossing where pedestrians will gather and wait. They are automatically created when you add a new crossing but if you want to discard them, untick one or both of the options:
-
Create Waiting Area on the Left
-
Create Waiting Area on the Right.
-
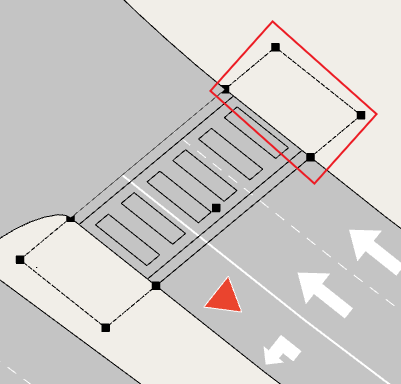
To move or resize a waiting area, click on the pedestrian crossing and drag the waiting areas vertices (highlighted below).
-
Click OK to close the dialog and save your changes.
Time Series Tab
After completion of a simulation with pedestrians, you can view the corresponding time series on this tab.
Attributes Tab
Any additional attributes of the pedestrian crossing are displayed on this tab.