Importing from TransCAD
This section shows the steps required to import an existing TransCAD model to create an Aimsun model. The data that can currently be transferred is:
- The road network, including all the attributes associated with links and nodes
- The centroids and centroid connectors
- The OD matrices
The first part of the task is to export the network and the matrices from TransCAD in a format that can be read by Aimsun Next. The second part of the task is to read those files into an Aimsun document.
Exporting data from TransCAD
This section describes the steps required to export from TransCAD the network as link and node shapefiles, and the matrices as text files, structured as required to be imported by Aimsun Next.
Exporting the network
Use TransCAD to open the geographic file that contains the network (links, nodes, centroid connectors and centroids). Before saving the links and the nodes as shapefiles, associate to each link the From Node ID and To Node ID as detailed next, otherwise Aimsun Next will not be able to create the turning movements between the links.
- Activate the Highways/Street layer.

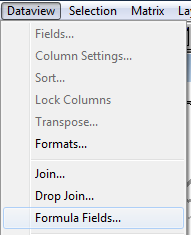
- Go to the Dataview > Formula Fields… menu:
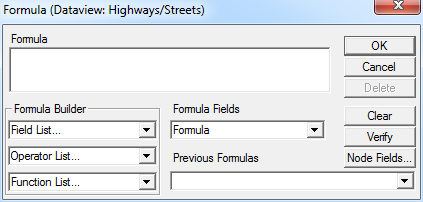
- Click Node Fields….
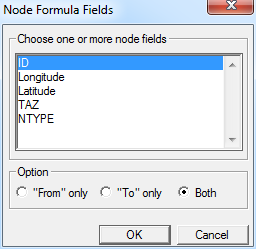
- Select ID, check Both to include the From and To nodes and finally click OK.
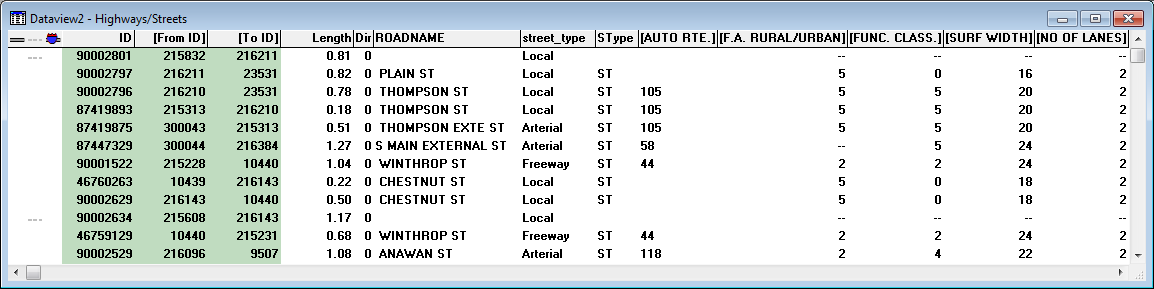
Open the dataview to check that it now contains two additional fields, [From ID] and [To ID] as shown below:
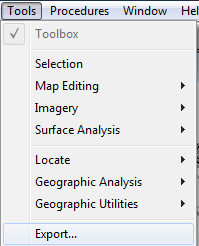
Next save the links as a shapefile. Go to the Tools : Export… menu:
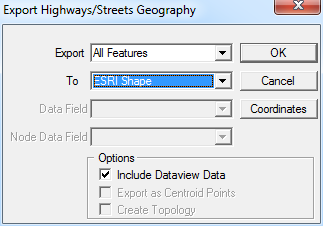
Choose All Features as the filter and ESRI Shape as format, click Coordinates and ensure that the Coordinate System is set as Longitude, Latitude, ensure that the Include Dataview Data option is checked, and finally click OK.
Exporting the nodes is optional: Aimsun Next does not need a node shapefile to import the network. However, if one is provided, the TransCAD node attributes will be made available in the Aimsun traffic network. To save the nodes as a shapefile, activate the Nodes layer. If it is not shown in the drop-down box, open the Map Layers and un-hide it.

Exporting the shapefile for the nodes is then undertaken in exactly the same way (from the Export menu) as described for exporting the links above.
Exporting the matrices
Open the TransCAD matrix file in the same model (without closing the network). The rows and columns must be labeled with the node IDS before the matrix is exported. This can be done with the Row and Columns Label tool  .
.

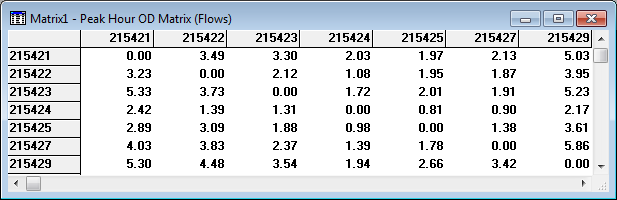
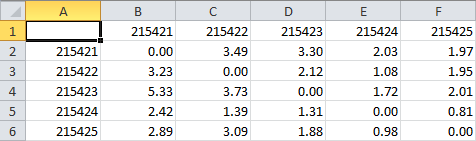
The resulting matrix will look like:
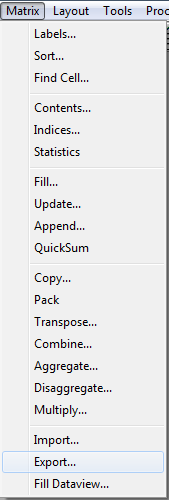
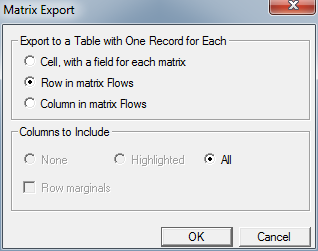
If the file contains several matrices, select the one to export from the drop-down box  and go to the Matrix > Export… menu:
Check the option to export one record for each row in the matrix and click OK.
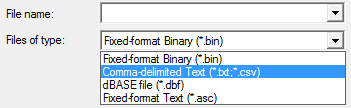
Finally select Comma-delimited Text or dBASE file as file type and export the file.
Repeat the process for all the matrices to be exported.
Importing the data into Aimsun Next
Prepare the Template
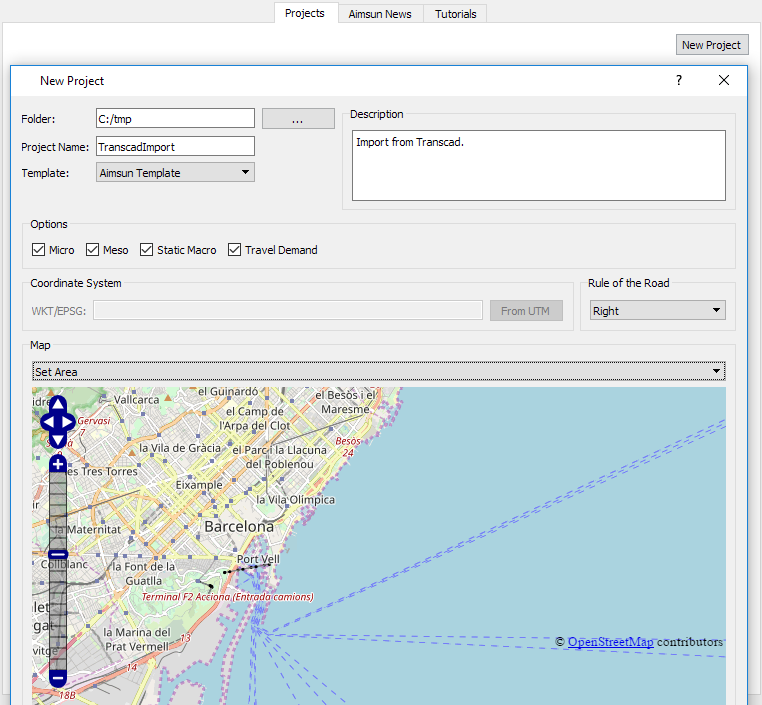
Create a new project using a template. The UTM zone will be determined from the latitude and longitude assuming the co-ordinate system in meters was used when exporting the shapefiles. Otherwise, it is important to set correctly the UTM zone or WKT/EPSG reference. This can be done when starting a new project, or from the project properties.
Before starting the import process, the Road Types and the Volume Delay Functions that will be associated with the links imported from TransCAD should be created. The importer will require these are available so that Road Types in Aimsun Next can be assigned to imported sections using the values of an attribute in TransCAD (e.g. TYPE or STREET_TYPE) and Volume Delay Functions in Aimsun Next can be linked to different values of an attribute in TransCAD (e.g. TYPE or LTYPE). These can be set later, but if the types are available as the network is imported, the process is smoother and more information is directly imported.
Importing network
Go to the File / Import / GIS menu in Aimsun Next.
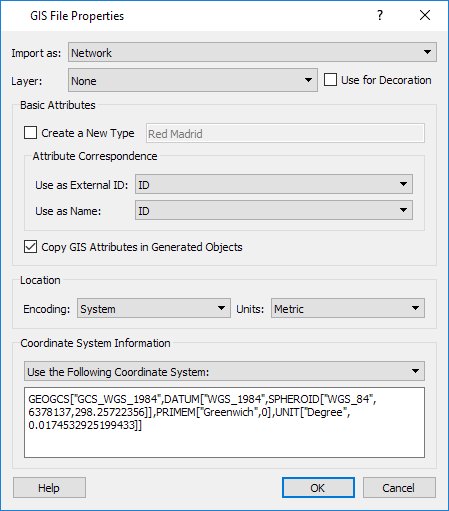
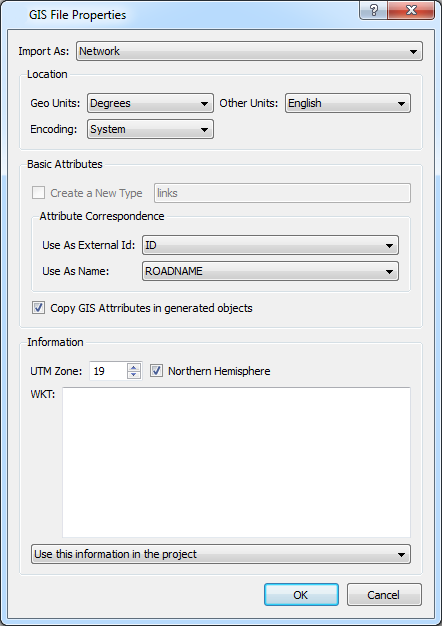
Select the link shapefile recently exported from TransCAD. Choose Import As: Network, set the Location options as appropriate, and select the fields to be used as External ID and as Name for the road sections (Aimsun Next will automatically provide a best guess). The Copy GIS Attributes in generated objects ensures that all the fields in the shapefile will be available as attributes for the objects in the Aimsun model. Verify that the UTM Zone has been recognized correctly and click OK.
In the Network Import Dialog, the set of conditions to map the attributes, to define the topology, to identify the centroids and centroid connectors, and to map the Volume Delay Functions is defined.
Basics
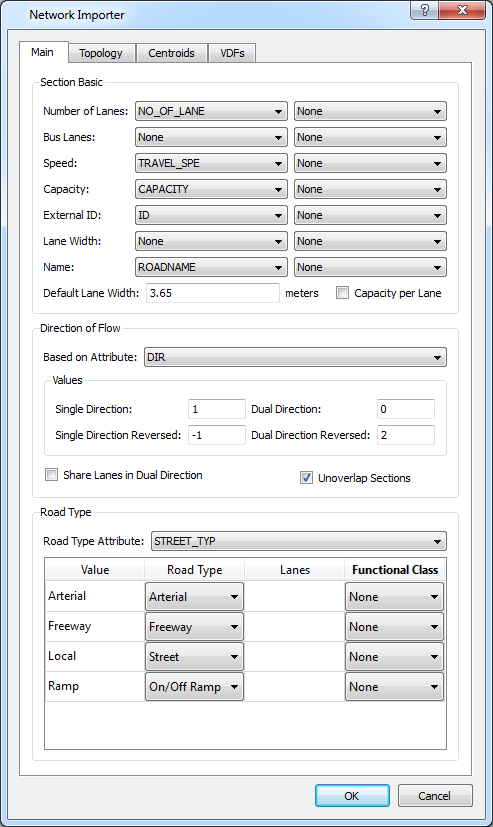
In the Main tab, under Section Basic, choose the fields in the shapefile that correspond to number of lanes, bus lanes, speed, capacity, external ID, lane width and name. The second column of dropdown boxes provides the choice of a different field for each direction if the link is bidirectional. If the lane width is not specified in a field, set the default lane width. Check the Capacity per Lane option if the value in the capacity field is per lane and not per link.
Under Direction of Flow, select the DIR field and set 1 for single direction, -1 for single direction reversed, 0 for dual direction and any other number for dual direction reversed (this last data not used in TransCAD). Toggle Avoid Section Overlap as desired and check Share Lanes in Dual Direction if the number of lanes in the shapefiles is the total for both directions on a bidirectional link.
Under Road Type, select the field (typically TYPE or STREET_TYPE) that provides the type of the link and map each different value to a Road Type, assuming these were set up before the import. The Lanes column can be used to set a default number of lanes for the different road types, if it is not specified on a link by link basis.
Topology
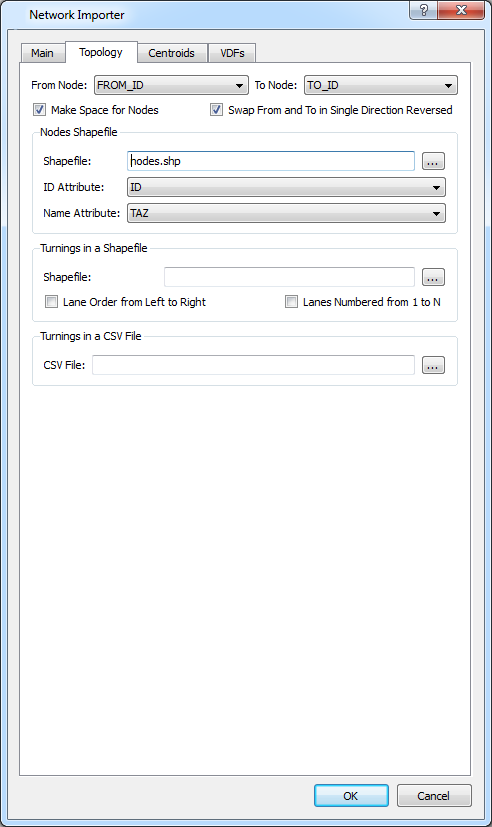
In the Topology tab, select FROM_ID as the From Node and TO_ID as the To Node. Check Make Space for Nodes to offset the beginning and end of the sections so that there is space for the intersection area and Swap From and To in Single Direction Reversed to specify that the From Node is TO_ID and the To Node is FROM_ID in the case where the direction is -1.
If the node fields are to be available as attributes of the intersections, under Node Shapefile select the nodes shapefile recently exported from TransCAD and select the fields to be used as external ID and name.
At each node, Aimsun Next will generate all the turns from all the sections that have this node as FROM_ID to all the sections that have it as TO_ID (except u-turns). As an alternative to this automatic turn generation, turns can be imported from a shapefile or also from a CSV file (comma separated, no header) can be used that contains the three following fields to specify the turns:
- node ID,
- from section ID,
- to section ID
Select this file in the Turns in a CSV File section.
Centroids
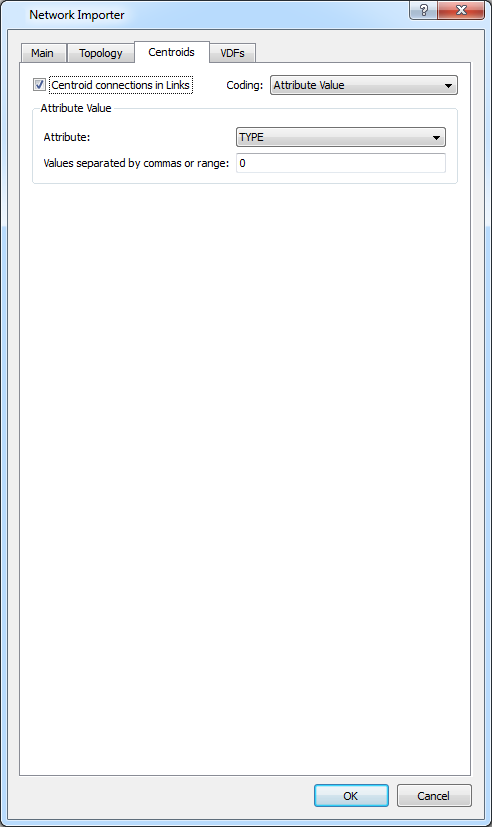
In the Centroids tab, check Centroid Connections in Links and select Attribute Value. Choose the attribute and the value(s) that identify a link as a centroid connector (typically TYPE = 0).
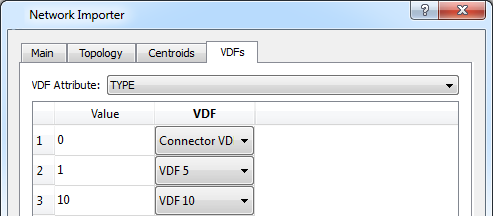
VDFs
Assuming the volume-delay functions that correspond to the ones used in TransCAD were created before starting the import process, go to the VDFs tab, choose the attribute that should be used to select the function (typically TYPE or LTYPE), and assign one function for each different value. Otherwise the volume delay functions will be associated with the sections according to the Road Type.
Click OK to import the TransCAD network.

If the network is big, some sections might be hidden because their Functional Class is higher than 2; if this is the case, zoom in to make them appear.
If the turn penalties are coded in TransCAD, that data can be saved in CSV format (File : Save As… and choose Comma-delimited text) and a script written that deletes the prohibited turns, creates the Turn Penalty Functions and assigns them to the turns.
The GIS importer saves an XML file in the same folder of the shapefile containing the entire configuration used in the process. If the same file is imported again, the settings are maintained.
Importing the matrices
Open the file exported from TransCAD with Excel. Copy the first column, containing the origin identifiers, and paste it transposed, as the first line, containing the destination identifiers. Save the file in CSV format (comma delimited).
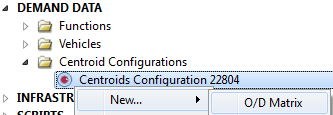
Create a new OD Matrix and double click on it.
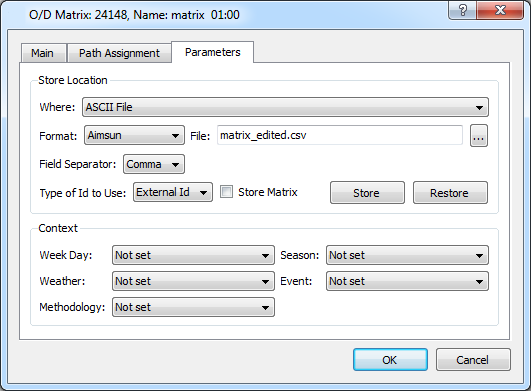
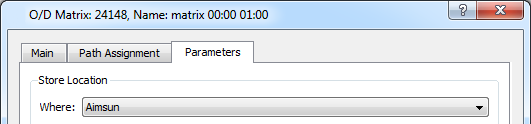
Go to the Parameters tab, under Store Location and choose
- Where: External File,
- Format: Aimsun ASCII,
- Field Separator: Comma,
- Centroid Storage ID: External ID,
Select the CSV file saved in Excel and click Retrieve.
If the import is successful, switch the store location back to Aimsun, so that the trips are stored in the ANG file when it is saved.
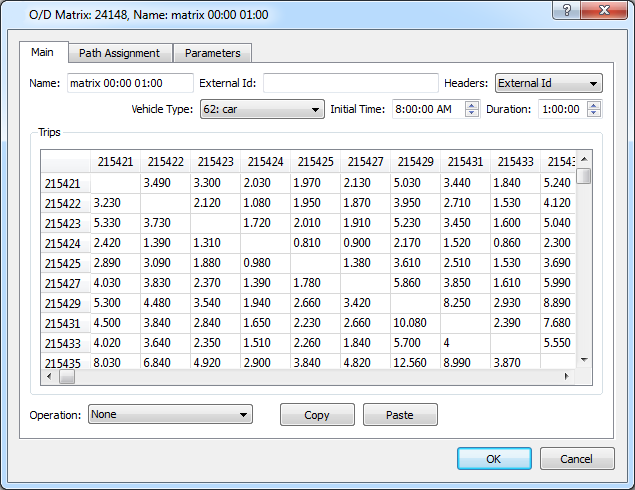
Go to the Main tab, set the Vehicle Type, the Initial Time and the Duration, and click OK.
This procedure must be repeated for all the matrices exported from TransCAD.