Layer Editing
Aimsun Next organizes graphical objects into layers which are used to group together related objects and control whether they are drawn, how they are drawn, and the order in which they are drawn on the screen.
Layers can contain drawing objects such as image files, graphical objects such as Autocad drawings (in which case, the layers of the Autocad drawing appear as sub layers), transport network objects such as road links or transit routes, etc. Layers can contain internal objects, those held in the Aimsun Next document, or they can contain external objects, those held in files referenced by the Aimsun Next document.
The Layers window does not prescribe a rigid organization of graphical objects; any object can be placed in any layer. It does however allow the user to structure the graphical display of the model to improve the visual outputs and to focus on the appropriate set of objects for a particular task.
Layers Window
The Layers Window can be displayed or hidden by accessing the Window / Windows / Layers menu option or the 'L' key shortcut.
Managing Layers
New layers can be created either accessing the New Layer option located in the View menu, by clicking on the '+' button in the top part of the layers window, or by opening a layer’s context menu and selecting the New Layer option to add new sublayer.
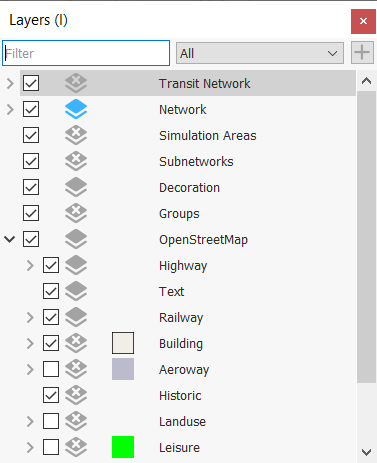
Layer visibility in the drawing window is selected by toggling the check box for an individual layer, or for groups of layers.
A layer can be moved within the hierarchy by dragging it to a new location in the layers window. The layers that are displayed in the layers window can be filtered by name by entering the name, or part of the name, in the filter text box. Layers can also be filtered by content type and status choosing from the dropdown menu options:
- All: All the layers
- Non-Empty: The layers that contain at least one object
- Empty: The layers that contain no objects
- Internal: Layers containing internal objects
- External: Layers referencing external files
- Active: The active layer
- Visible: The visible layers
Controlling Individual Layers
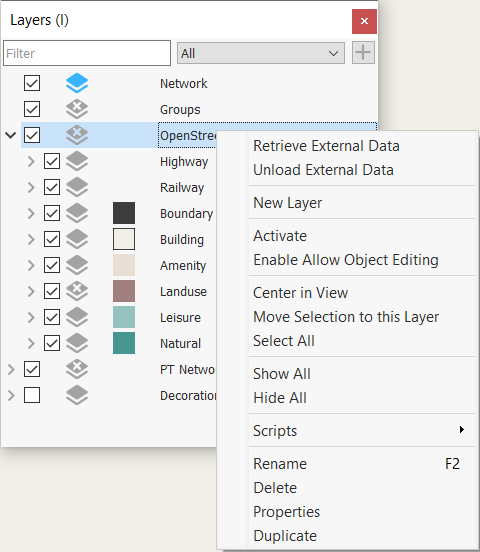
To create a new layer as a child of the selected layer, select the layer context menu New Layer option.
To rename a layer, open its context menu and select the Rename option, or open the Properties dialog and change the name.
To delete a layer, select it and press the Supr key or open its context menu and select the Delete option. All the objects held by this layer and any sublayers will also be removed.
Use the Show all and Hide all options to toggle the display of the objects in the layer. This is the equivalent of toggling the check box for the layer and its sublayers.
Use the Select All option to select all the objects held in this layer and sublayers. Subsequently, the context menu of any of the objects in the drawing window can be used to change the attributes of all the objects selected, or they can be moved together as a block of objects.
Use the Move Selection to this Layer option to move objects selected in the drawing window to this layer. When combined with the Select All option, the user is able to move objects between layers.
The Center in View option moves the drawing window viewpoint to the objects in this layer.
Use the Enable/Disable Allow Object Editing option to be able to select and edit the layer’s objects in 2D Views or to make them non-editable.
External Layers
Layers which link to CAD, or other external files, might delay loading the data to improve drawing speed and reduce memory use. Whether the data is loaded at start-up is controlled by the Auto Retrieve in the layer properties, Retrieve tab folder -the default for CAD files is set in the Preferences menu. The drawing can be explicitly retrieved or subsequently unloaded using the Retrieve External Data and Unload External Data options here. The icon for the external layer is dark gray if the data has been retrieved and light gray if the data has not been retrieved.
Active Layer
When a graphical object is created it will be added to the active layer which is marked by a blue icon in the layers list while the non active layers have gray icons. The context menu Activate option selects which layer is currently active and will receive new objects in the model.
Layer editor
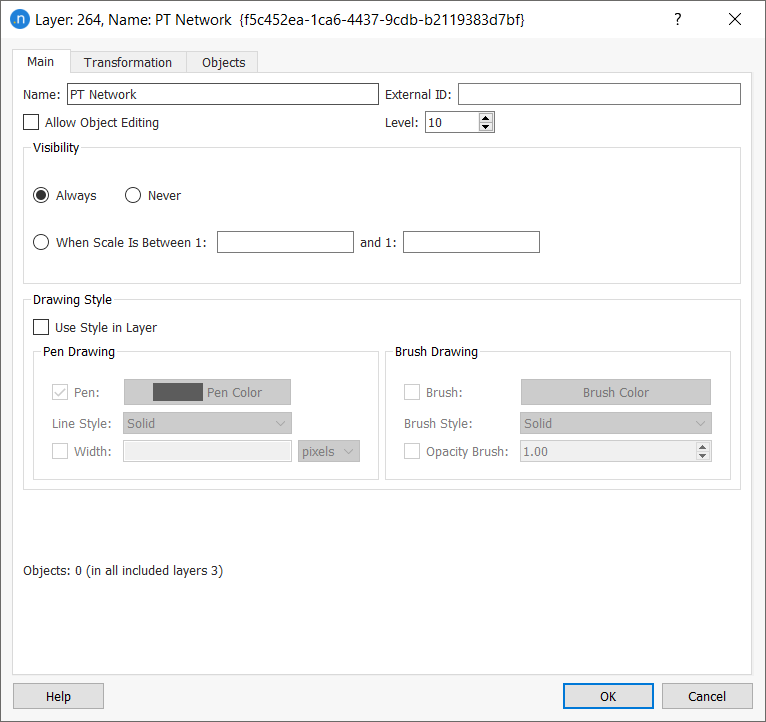
Main tab
Objects in a layer can be editable or non-editable (this is indicated in the layers window with a cross on the layer's icon  ). Check the Allow Object Editing option to be able to select and edit the layer’s objects in 2D Views.
The Level parameter defines the order of drawing the layers in 2D views and hence the visibility of objects; layers with a higher level are drawn over layers with a lower level. In 3D views, the Z co-ordinate of each object is used to determine the visibility rather than the layer information.
Layers can also be made visible depending on how far the user has zoomed in or out of the drawing. At high levels of zoom, it might not be appropriate to draw the detailed objects in the model. Set up the Visibility parameters to control this.
The Drawing Style for objects in a layer can be changed here and the modified style is shown in the Layers Window adjacent to the layer's icon.
Transformation Tab
The Transformation tab provides simple X and Y translation values for the objects in the layer. This translation does not apply to imported CAD objects.
Objects Tab
The Objects tab lists all the objects included in the layer. Selecting an object in the list centers the drawing window on that object.
Retrieve Tab
The Retrieve tab provides the option to retrieve external data on demand or to overwrite the default CAD drawing setting for this layer and retrieve the data automatically.
Editing Objects
The context menu for each object contains a Move to Layer option in the Arrange menu. This presents a list of layers and allows selected objects to be moved between layers.